How to Spatchcock, Dry Brine, and Roast a Turkey
Use this tutorial to make your best turkey yet and wow your friends and family.
Spatchcocking is the best way to cook your turkey in my opinion. It allows the bird to cook evenly and quickly, resulting in juicy breast meat and succulent thighs in a third of the time it takes to roast a whole bird. The only drawbacks to this method are the lack of traditional table presentation (who cares?) and the smokiness it sometimes causes in the kitchen. I find any poultry cooked at high heat causes some smoke, so turn your hood fan on and open a window! I did this tutorial with the cheapest utility turkey I could find, with a $3 foil tray, just to prove that you don’t necessarily need a beautiful heirloom, free range turkey (although I do encourage you to get one!) and a chef’s arsenal of equipment to do this! It’s easy! You got this!
Ingredients
For the Dry Brine
- 1/2 cup kosher salt
- Herbs or spices*
Preparation
1
Buy yourself a turkey. Mine was 16.5lbs. Make sure it’s fully defrosted the day before you’re going to cook it.
2
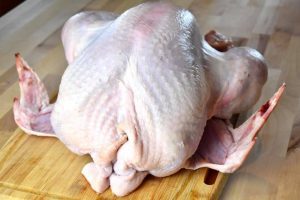
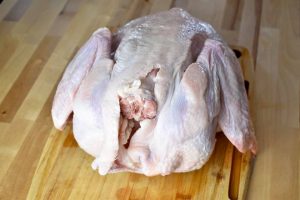
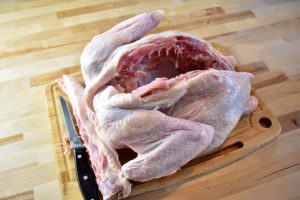
The day before you’re going to cook it, (or even 2 days before) start these preparations. Take your turkey out of the bag and remove any extra parts or giblets inside it. Set those aside for gravy. Put the turkey on a cutting board breast side down.
3
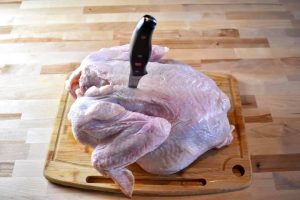
Take a sharp knife and stick it into the turkey along one side of its spine. With a sawing motion, carefully cut down the side of the entire bird. You want to separate the back from the spine and ultimately take the spine out altogether. When you arrive near the thighs, you’ll run into some extra resistance. Push through and persevere!
4
Do the same thing on the other side of the spine. Once cut all the way through, remove the spine and set it aside for making gravy.
5
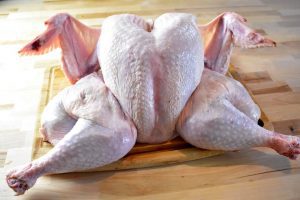
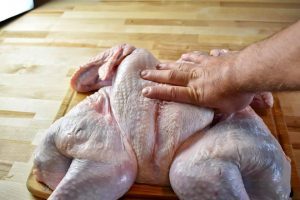
Flip the turkey back over so it’s breast side up. Push your hand down on the keel bone between the two breasts. You want to flatten the turkey and feel the ribs push out to both sides. Sing a loud song while you do this if you don’t like… meat sounds. Push hard!
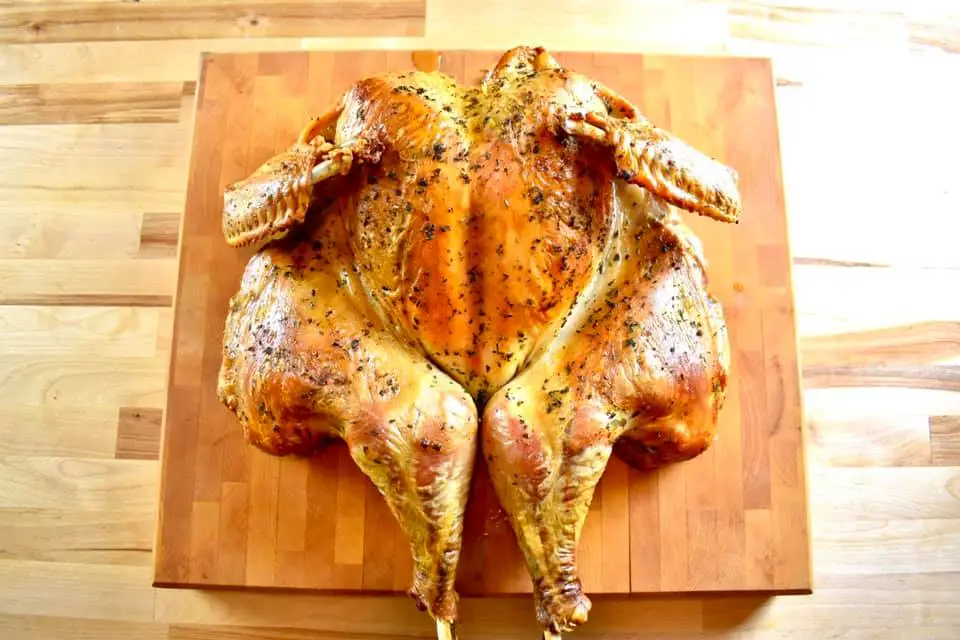
6
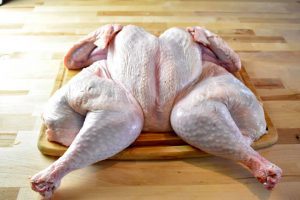
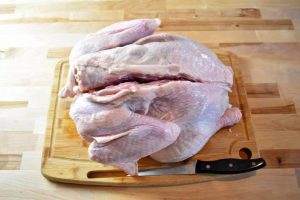
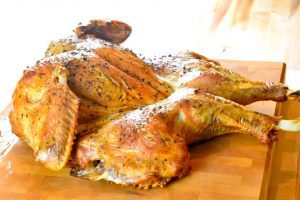
The turkey should now look like this.
7
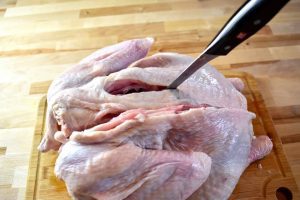
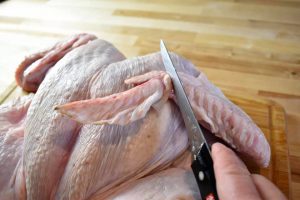
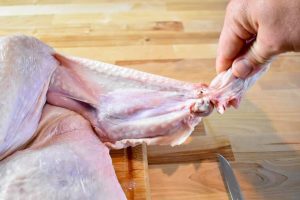
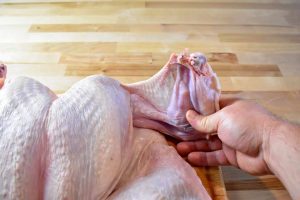
Now cut off the wingtips as they’ll just burn in the oven. Waggle the tip around so you get a sense of where the joint is. Slice all around that joint with the knife, then pop the wingtip backwards with your fingers. Cut any remaining connections and remove the tip. Repeat on the other wing.
8
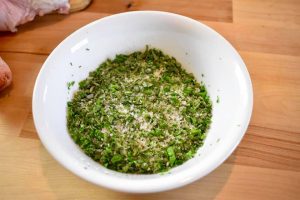
Fill a bowl with about 1/2 cup kosher salt, 1 tablespoon of baking powder (a Serious Eats trick for crispier skin), and whatever other seasonings you like. I used chopped fresh herbs, but you could do bbq rub, Cajun, za’atar, curry, dried herbs, herbs de Provence, etc. Mix the contents well.
9
Push your fingers under the skin of the breasts to open up a pocket in there. You should be able to put your whole hand in after some gentle pushing. Be sure not to tear the skin! Now grab a pinch of the salt mix and rub some directly on the breasts under the skin.
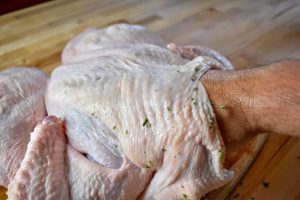
10
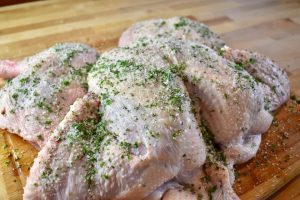
Use up the rest of the bowl by taking big pinches of the salt and rubbing it vigorously all over the bird, front and back. Get it into all those nooks and crannies!
11
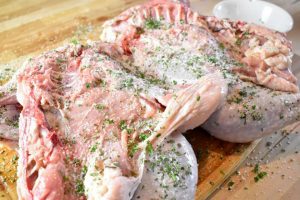
Put the turkey back into the fridge uncovered for 24 hours. If going longer (it will get saltier) you may want to cover it for the first 24 hours, then uncover for the last 24 hours.
12
Take out your turkey at least an hour before cooking it so it comes to room temperature. You can brush off some of the salt, or leave it in if you like saltier skin. Don’t worry, most of that salt is now sitting in the juices in the container the turkey was sitting in.
13
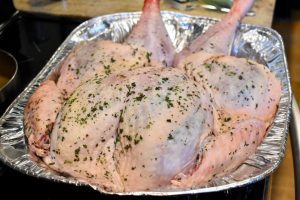
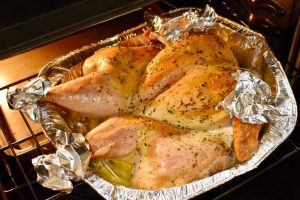
Preheat the oven to 450 degrees and put the rack near the bottom. Ideally you want your turkey on a rack sitting on top of a roasting pan to collect the drippings (this allows much better airflow than plopping it into a deep roasting pan), but I did it in a cheap tin foil pan to show you it’s possible to do so.
14
Once the oven is preheated, put the turkey in. Keep an eye on it and turn the whole pan around a couple times during cooking so it roasts evenly. I had to put foil on the legs and wings so the tips didn’t burn. Only do this if they seem likely to burn. You can tent the whole bird in foil if it looks like the breast skin might burn.
15
Start checking breast temperature after an hour. You want to take the turkey out of the oven no later than at a temperature of 160 degrees! If it goes beyond that, you’ve got dry breasts my friend.
16
My 16.5lb turkey took just under 2 hours, but turkeys and ovens vary, so don’t rely on time, just on breast temperature. Make sure you test in the meaty centre of the breast and not in a bone. Don’t worry about the thighs, they’ll be done.
17
Once the temperature reads 160 degrees (or a bit less if you’re a rebel) take the turkey out and let it rest for at least 30 minutes! Don’t skip this part! This is a great time to throw your dressing in the oven and get the rest of your meal ready.
18
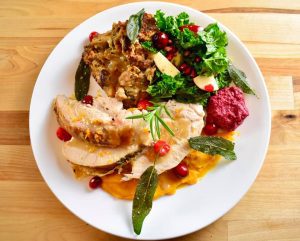
Carve that bad boy up and serve! Hopefully you’ve just begun a new Thanksgiving tradition! ![]()
*I used a mix of minced fresh parsley, sage, rosemary, and thyme, but you can use any herb or spice blend you want! BBQ rubs, Cajun spice blend, za’atar, curry, jerk, herbs de Provence, Chinese 5 spice, etc. all would work great!