Eastern European Bear Dumplings – Bears, Beets, Battlestar Galactica
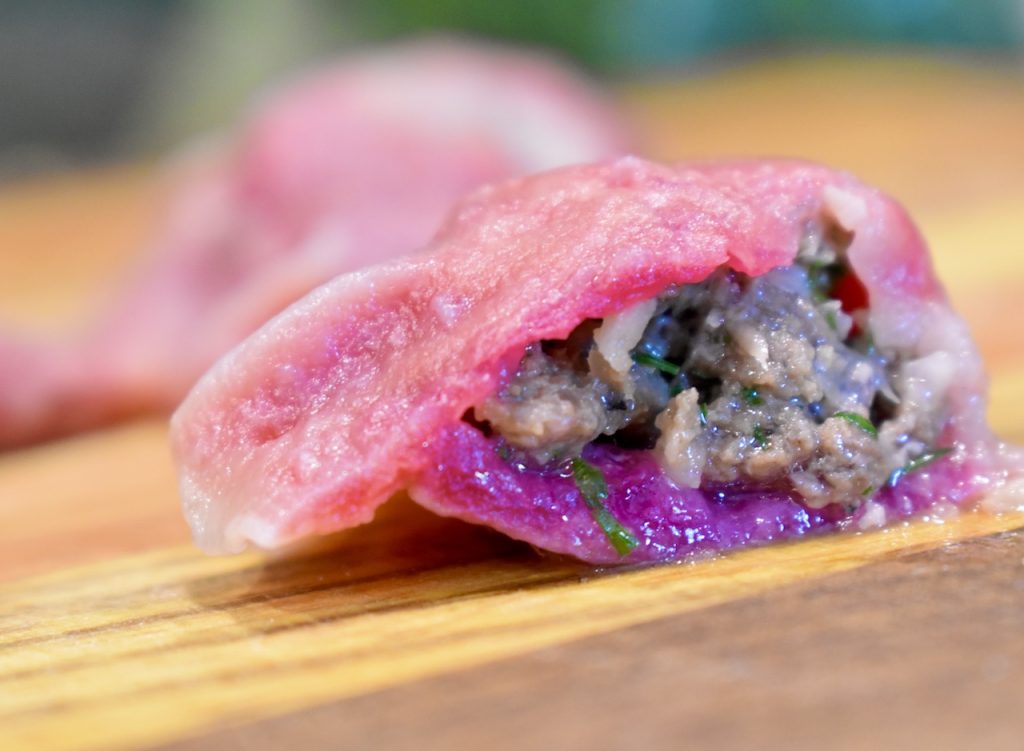
These gorgeous fuchsia-hued dumplings are made by adding beet purée to the dumpling dough. They are then stuffed with ground bear, which has been seasoned with ingredients inspired by Eastern Europe, including horseradish, dried ceps (boletes mushrooms), garlic, and dill.
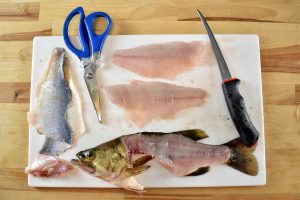
The bear meat adds a beautiful richness and goes very well with the seasonings, but the dish could easily be made with ground pork instead.
When making them, all I could think of was Jim from The Office, imitating Dwight: “Bears. Beets. Battlestar Galactica.” Dwight’s three favourite things to talk about.
After eating these dumplings, it’s all I can talk about too!
I was taught how to make dumplings by the talented Xiaobing at Long Road Ecological Farm using a Chinese technique.
Watch this video to see a dumpling forming technique that is similar to the one that I describe, as well as fancy ways to crimp and fold your dumplings: https://www.youtube.com/watch?v=hCqf-h95m2A
- Prep Time2 hr
- Cook Time10 min
- Total Time2 hr 10 min
- YieldApprox. 30-36 dumplings
Ingredients
For the Dough
- 1 medium-small beet
- 1/2 cup (125ml) water
- 2 cups (240g) white flour
- 1 pinch kosher salt
- ~1/2 cup (125ml) water
For the Filling
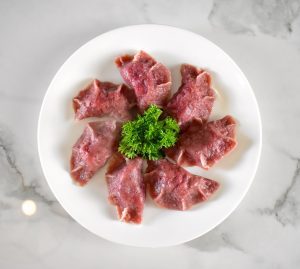
- 8oz (225g) ground bear (or pork)
- 1 teaspoon (5ml) bear lard or vegetable oil
- 1 teaspoon (3g) kosher salt
- 1/2 teaspoon (1g) black pepper
- 1 tablespoon (15ml) prepared horseradish
- 1/2 cup (5g) fresh dill, chopped
- 2 cloves garlic, minced finely
- 3 dried ceps (porcini, boletes, suillus, mushroom) caps, reconstituted in hot water, then chopped (optional)
Preparation
Peel the beet, trim the top and bottom, then chop.
Add it to a blender with 1/2 cup of water and blend on high for at least 30 seconds, or until purée is smooth.
Add the flour and salt to a large bowl. Mix well.
Pour in the beet purée (and any pulp) into the flour and use a spatula or wooden spoon to begin mixing it in.
Begin adding water in small increments, up to 1/2 cup, while stirring and folding, until the dough forms into a ball.
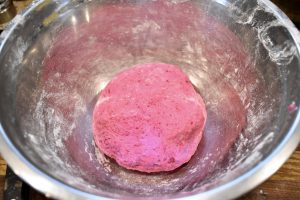
Grip the bowl with one hand and use the other to begin kneading the dough, firmly flipping it and pressing it in on itself. If there is still flour in the bottom of the bowl, add a touch of water, if it is sticking to your hands too much, add a touch of flour.
Keep kneading until the dough becomes smooth and elastic, about 2-5 minutes.
Cover the bowl with a damp towel and let rest for about 20 minutes.
Meanwhile, make the filling by adding all of the ingredients to a bowl and mixing with a spoon or fork, always in a clockwise circular motion.
By maintaining the same direction, the filling will emulsify and become sticky, which is what you’re looking for.
Set the filling aside in the fridge for the time being.
Turn the dough ball out onto a large, well-floured surface.
Cut it in half and put one half back into the bowl and cover it.
Roll the other half into a thin log, about 1″ (2cm) thick in diameter.
Cut the log into 1″ (2cm) pieces.
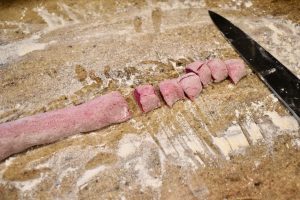
Make a little flour well on the edge of your work station and plop the dough pieces into the flour.
Take one and use your fingers to pinch it into a nice vaguely cylindrical shape.
Now press down on top of it with the heel of your hand to flatten it into a circle.
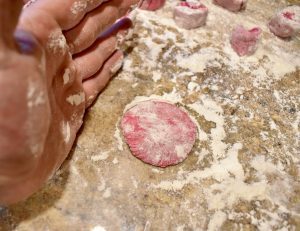
Take a small, thin rolling pin, piece of dowel, or even a beer bottle, and roll out the dough circle until it’s about 3″ (7.5cm) in diameter. Try to keep it mostly circular shaped.
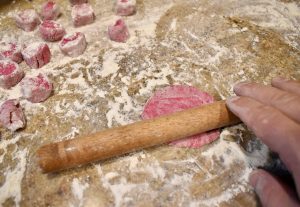
I like to lift one edge of the disk up with my left hand and roll the rolling pin with the fingers of my right hand (I’m right handed) and spinning the disk.
If things start feeling sticky, don’t be afraid to add more flour.
This takes practice! It can be hard and frustrating at first, but I made the recipe so you end up with lots of leftover dough, so it’s okay if you make mistakes. Just throw out the piece of dough and start over if it’s not cooperating. If it’s just too hard, you can roll out the whole piece of dough very flat and cut out circles with a glass.
Put the flattened disk of dough into the palm of your off hand. Spoon out about a teaspoon or so of the meat filling into the middle of the disk. The more filling you put in, the harder it will be to work with, so start small.
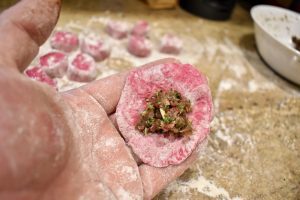
Fold one side over the filling to meet the other side, creating a half moon.
Use your thumb and forefinger to press the edges together firmly, creating a seal.
You can leave them like that, or you can crimp them into fancy shapes. Watch the video in the intro to see how.
Put the finished dumpling on a sheet pan dusted with flour (so they don’t stick).
Repeat with the rest of the pieces of dough. If you need more dough, roll the other piece of the dough ball into a log and repeat the above steps.
Fill up the sheet pan, making sure that none of the dumplings are touching.
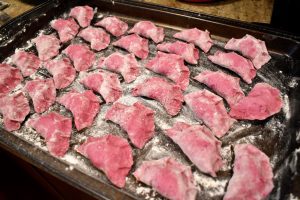
Put the sheet pan in the freezer for several hours. Once the dumplings are frozen solid, you can dump them into a freezer bag and store in the freezer for several months.
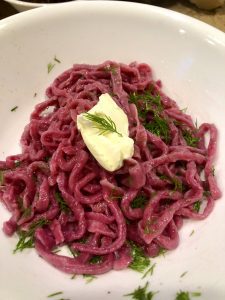
You’ll probably have some dough leftover. You can dispose of it, or do like I do and roll it out flat and thin, then cut it into thin strips, dusting liberally with flour.
Add the strips (noodles) to salted boiling water for 3 minutes, then drain and toss with butter and whatever seasonings you like for a quick lunch!
To Cook
To cook the frozen dumplings, bring a large pot of water to a boil.
Add the dumplings and bring back to a strong simmer.
Cook for 10 minutes, then remove from the water.
Since it is bear, I always cut one open to be sure it’s cooked all the way through (undercooked bear carries trichinosis, which is bad, mkay?).
From there you can serve it as is, or add it to a cast iron pan with some oil and cook them until the bottoms are crispy.
Serve plain, or with sour cream and dill or parsley. Enjoy!