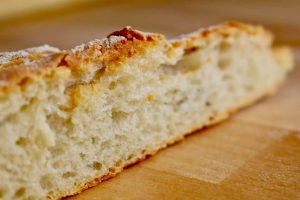
Garlic and Rosemary Baguette

The addition of garlic and rosemary makes this bread extra delicious! Serve with charcuterie, as a sandwich, or on its own slathered with some good quality butter.
- Prep Time2 hr 30 min
- Cook Time40 min
- Total Time3 hr 10 min
- Ready in3+ Hrs
- Yield2 loaves
- Cuisine
- Cooking Method
- Suitable for Diet
Ingredients
- 1/4 cup warm water
- 1/2 packet of active dry yeast
- 3 1/2 cups (16 oz) all purpose flour or bread flour
- 2 teaspoons Kosher salt or 1 1/2 teaspoons table salt
- 2 large cloves of garlic, peeled and sliced thinly
- 1 sprig of rosemary, stripped from the stem and finely minced
- 6 sprigs of garlic chives, minced (optional)
- 1 1/4 cups water
- Flaky salt, like Maldon, for finishing (optional)
Preparation
Fill a bowl or cup with the warm water (not hot!), then sprinkle over the packet of yeast. Set aside. The yeast should dissolve into the water and foam up.
In a large bowl, add flour, salt, garlic slices, rosemary, and garlic chives (if using). Stir until well combined.
Stir in the yeast/water mixture.
Using a wooden spoon, begin stirring the flour mixture while slowly adding the water. Keep adding and stirring until the dough becomes ‘shaggy’ (look online for examples) and stiff. You may not need all of the water for this, so don’t dump it all in at once.
Cover the bowl with plastic wrap or a towel and let rise for about 30 minutes.
If your kitchen is nice and warm this can be done on the counter. If not, try putting the bowl in the oven with the oven light on (don’t turn the actual oven on!).
After 30 minutes, turn the dough out of the bowl onto a lightly floured surface.
Form into a vaguely square or rectangular shape, then fold over a third of the dough onto itself. Turn 90 degrees and repeat 3 times. Be gentle. This dough needs just a little bit of handling to form its gluten, it won’t appreciate being kneaded roughly.
Wipe out the bowl you’ve been using, then grease it with a bit of olive oil.
Return the dough back into the bowl, then flip it over, so both sides have been exposed to the oil.
Cover again with plastic wrap and let rest in a warm place for another 1.5 – 2 hours, or until doubled in size.
Once doubled, turn the dough back onto a lightly floured surface. Divide the dough into 2 and form into long loaves with pointed ends (like baguettes!).
Transfer loaves to a lightly greased baking sheet, ensuring that there is ample room between them. If not, use 2 baking sheets.
Cover with greased plastic wrap (you can use the same piece throughout this whole recipe to avoid wastage) and let rest/rise for another 30 minutes.
While the loaves are resting, preheat the oven to 450°F (230°C or gas mark 8).
Put a casserole dish full of water on the bottom rack (this ensures that nice crusty baguette texture), and adjust the other rack to upper-middle.
After 30 minutes, uncover the loaves.
Using a sharp knife or razor, make 3-4 shallow slashes diagonally on the top of each loaf. This not only looks pretty, but will give you crustier loaves!
Dust the loaves with a little bit of flour and some flaky salt (optional).
Put loaves in oven and bake for approximately 30-40 minutes.
Since all ovens vary in temperature, it is up to you to keep an eye on the bread as it cooks. Once it turns crusty and brown and beautiful, give the loaves a tap. If they sound hollow, they’re done!
Carefully transfer the bread to a cooling rack and see how long you can wait before tearing into one!


