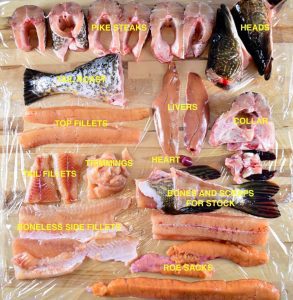
After a successful day ice fishing, I came home with two 5-6lb northern pike and a little perch. Intending on using everything I possibly could from the fish, I butchered them with near-zero wastage in mind. One of the pikes was female and came with two delicate roe sacks in the belly cavity. The perch also came with a much smaller roe sack. What a treat!
Roe sacks, also called skeins, can be sliced and fried up like fillets, and make for very good eating. The flavour is very much like a fillet, buttery and slightly salty, while the texture is a little different, slightly grainy but not at all unpleasant.
I decided to use one of the roe sacks for sautéing and one for making cured pike roe, which is a product very similar to caviar. It’s a pretty simple process and results in delicious tiny fish eggs that pop in your mouth in a salty burst that is reminiscent of fresh ocean. It’s not everyone’s cup of tea, but for those who like caviar, or enjoy salmon or tobiko roe on sushi, cured pike roe is a must!
Follow these steps to make your own!
How to Make Cured Pike Roe

This recipe can be used for any fish roe, though the size of the roe dictates how long you leave them in the cure. If the roe is from perch, or panfish, 10-12 minutes is probably enough. If the roe is larger than pike’s, say from a trout, then you may want to cure for 30+ minutes. Taste along the way and once they taste salty enough, you can stop the curing process. I used a 1:8 salt to water ratio. If you have more or less roe to cure than I did here, you can scale the recipe up or down using that ratio.
Warning: Though there is plenty of anecdotal evidence showing that it is safe to eat lake fish roe, there could be a risk in eating it, especially for those who are immuno-compromised. Use clean fish, from clean water. Use common sense, and if you are worried about it, please don’t eat it.
To further minimize the risk, you can freeze the eggs. Once they are scraped out of the sack, put the eggs in the deepfreeze for a couple days. Gently thaw them out, then proceed with the salting/curing process.
For the Roe
- 1/2 cup (120g) kosher salt
- 4 cups (1000mL) water
- 1-6 roe skeins/sacks
Preparation
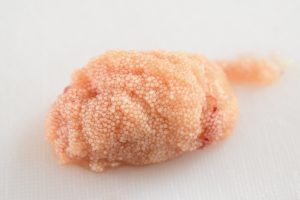
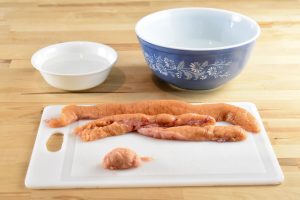
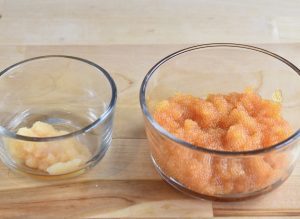
This is the perch roe sack. Notice the skein is barely visible and the eggs are very tiny. There was only one sack inside the perch.

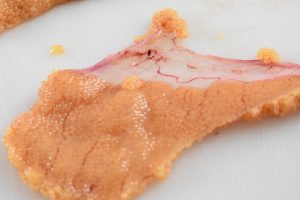
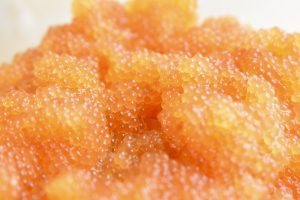
This is the pike roe sack. I accidentally broke one of the sacks while extricating it from the fish. It’s okay if you do this, as it won’t matter in the long run.
Notice that the skein is way more visible on the pike roe and that the eggs are larger.
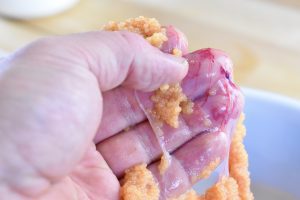
This photo shows the skein separated from the roe sack. You can see that it is a very thin membrane that holds the eggs together.
The eggs are very sticky and don’t want to be separated from the skein. This is because pike lay their eggs on underwater grasses and the eggs are meant to stick to the grass, holding fast until the pike hatch.
Pour 1 cup (250mL) of hot water into a large bowl. Pour in the salt and stir until it has dissolved.
Now add 3 cups of cold water and give it a good stir.
Get the tap running hot, but not hot enough to hurt your skin.
Rinse the full roe sacks under the hot water for 5 full seconds, making sure the water touches the entire skein.
This will help tighten the skein and allow the eggs come out easier.
Break open the skein with your fingers or a knife by making a slit lengthways down one side.
Drape the skein over your fingers, with the cut side facing up.
Now, working over your bowl of salt water, begin using your thumb to gently but firmly brush the eggs into the water.
The skein is likely to break off in some small sections making it difficult to get the eggs off, that’s okay for now.
*At this stage you can brush the eggs into a sealable container and freeze the eggs for 48 hours to kill off any potential nasties. Gently thaw, then proceed with the saltwater cure.
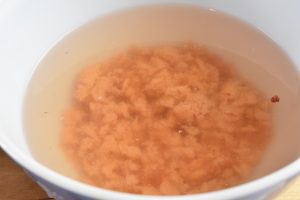
Once all of the eggs are in the salt water, let them sit for 20 minutes to cure.
For the perch eggs, I soaked them in the same 1:8 salt to water ratio for 10 minutes since they were so much smaller.
I chose 20 minutes because that is how salty I like the end product to be. You can taste every 5 minutes after the first 10 minutes and up to 60 minutes. If you feel that the eggs are salty enough at that point, you can move to the next step.
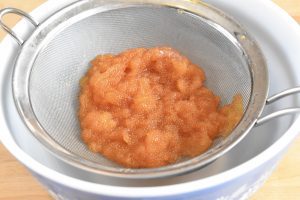
Drain the roe through a fine mesh strainer.
Pick through the eggs, pulling out any pieces of skein you find. Some pieces will have eggs firmly stuck to them. Try to get as much out as you can, but if it proves to be too difficult, break the egg-laden pieces of skein up into very small pieces, and you’ll hardly notice it later.
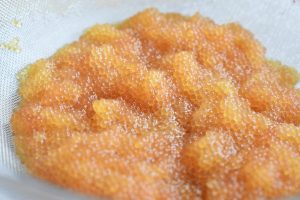
Swirl the strainer in a circular motion, trying to get all of the liquid out. You can help this along by swirling your finger through the eggs as well.
Taste some and see if you’re happy with the saltiness. If you find it too salty, you can give the eggs a very quick rinse under cold water (for only a second or two). Taste again and repeat if necessary.
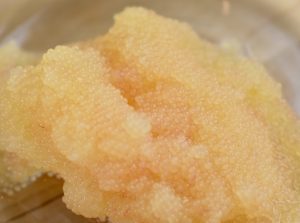
The eggs will have a slippery yet sticky texture, that will firm and dry up a bit in the fridge.
Decant the roe into glass jars or containers. It is ready to eat!
Keep in the fridge, and be sure to use it up inside one week.
Eat on its own with a spoon, or try it on crackers with cream cheese, blinis with sour cream, mini pancakes or crepes with yogurt, on rice, on sushi rolls, on dark rye bread, or as a garnish. Enjoy!
Notice how I didn’t have you scroll through pages of mundane nonsense to get to the recipe? Notice that there were no annoying pop-ups or ads? That was on purpose!
I want finding and using my recipes to be easy for you, not frustrating. That does translate into a lot of lost income for me though. If you made this recipe and loved it, would you consider “buying me a coffee” and donating a buck or two through the Buy Me a Coffee app? It will help me keep pumping out recipes like this one!